
Encapsulated Nails- Winter Wonderland Edition
Encapsulated Nails- Winter Wonderland Edition
You’ll love encapsulated nails in the Winter Wonderland Edition. They combine stunning designs with essential protection for weak or damaged nails. Think deep jewel tones like emerald green or icy pastels like baby blue to capture that winter spirit. Plus, you can add glitter or even tiny charms for a festive touch. For the best results, you’ll need a few key tools like nail glue, clear acrylic powder, and a good application brush. Regular care is crucial, too. Keep your cuticles moisturized and avoid using your nails as tools. There’s so much more to explore about this stylish trend!
Understanding Encapsulated Nails
Encapsulated nails are a unique solution for managing various nail conditions, combining aesthetics with functionality. They’re designed to provide support and protection, especially for weak or damaged nails. By encasing the natural nail with a durable layer, you can prevent further injury while enhancing the overall look. This technique not only boosts your confidence but also promotes healthier nail growth over time.
Essential Tools and Materials
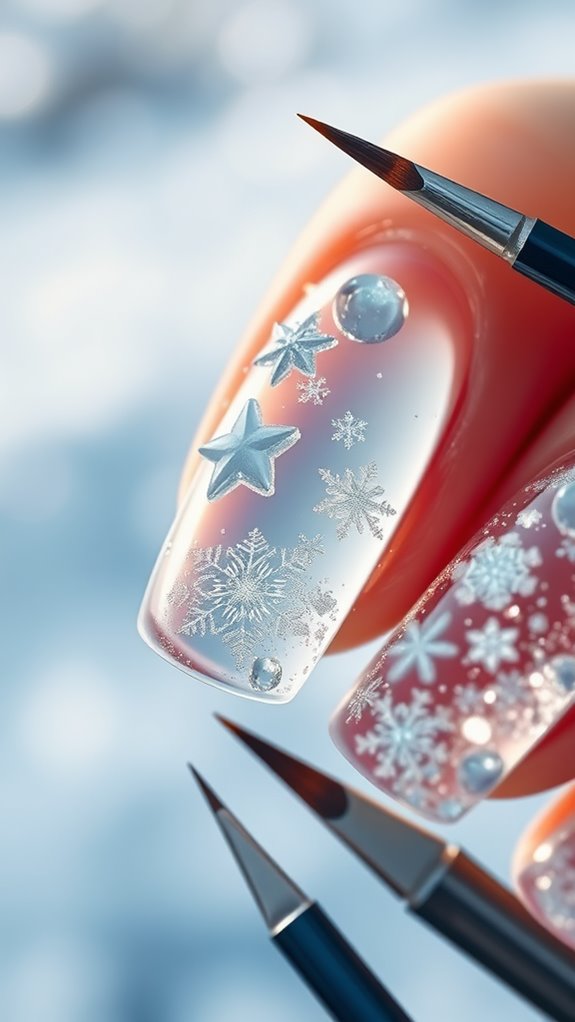
To successfully create encapsulated nails, you’ll need a few essential tools and materials that ensure both effectiveness and safety. Start with a quality nail file, a buffer, and nail glue. You’ll also want a clear acrylic powder and liquid, along with a brush for application. Don’t forget a top coat for shine and durability. Having these items ready will streamline your process.
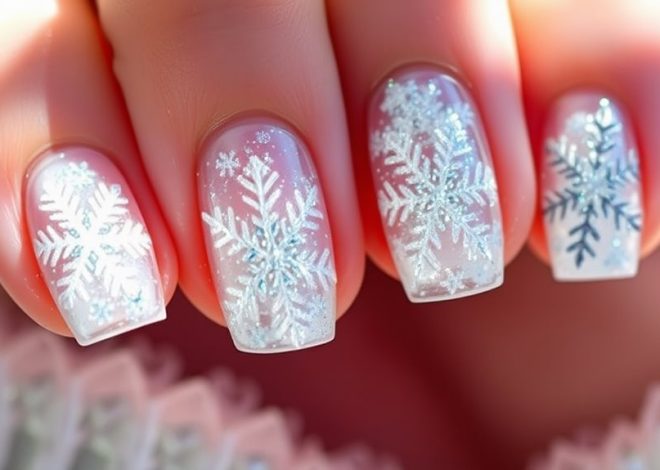
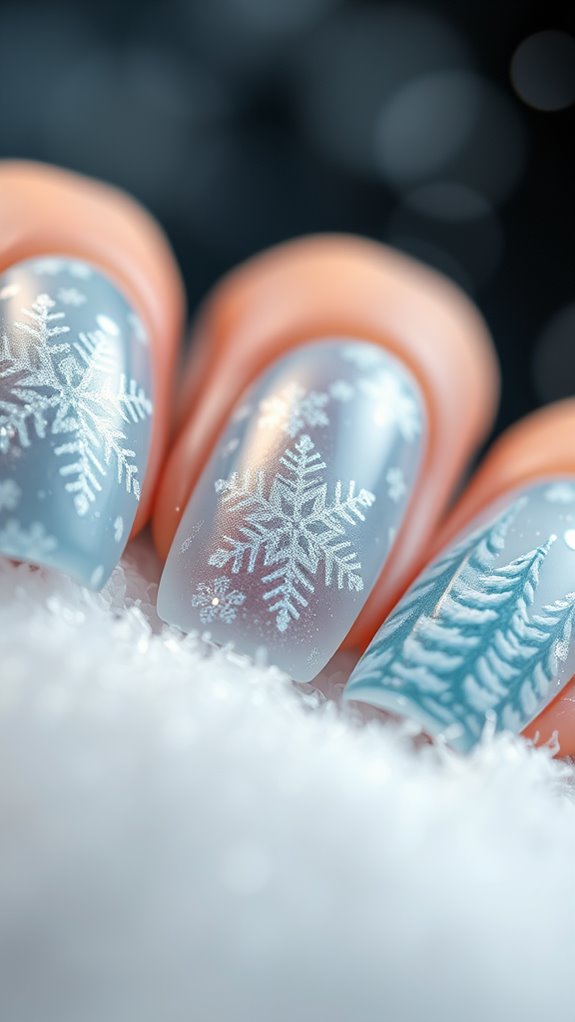
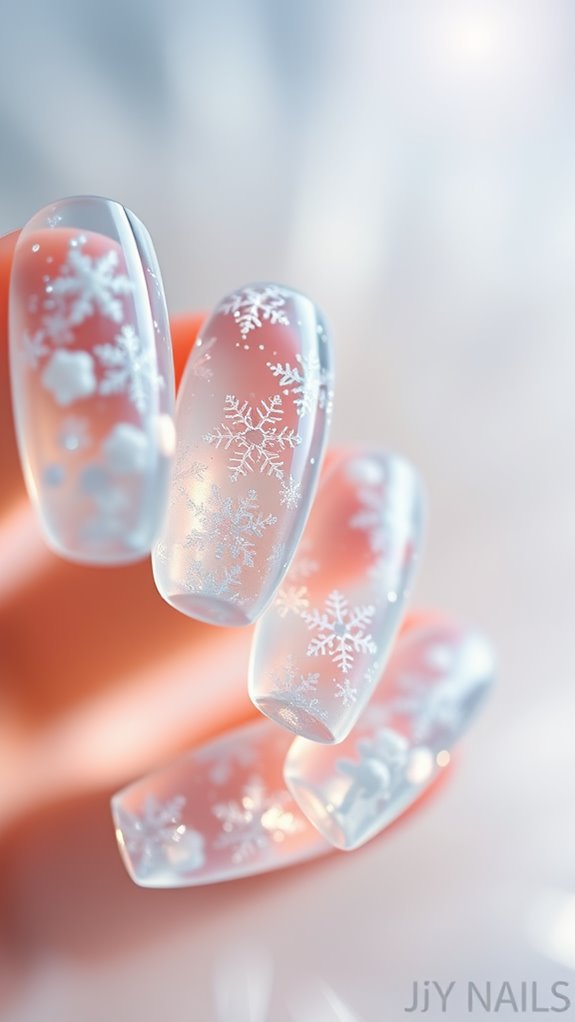
Winter Color Palettes
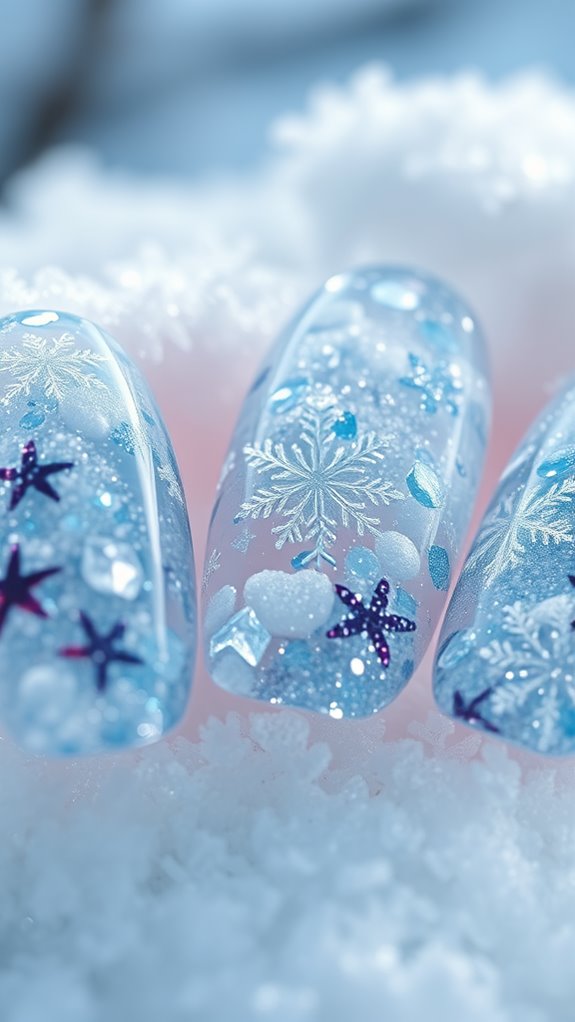
As the colder months approach, selecting the right color palette for your encapsulated nails can truly elevate your winter style. Consider deep jewel tones like emerald green or sapphire blue for a luxurious feel. Soft neutrals such as taupe and blush add warmth, while icy pastels like lavender or baby blue evoke a winter wonderland. Choose colors that reflect your personality and seasonal vibe!
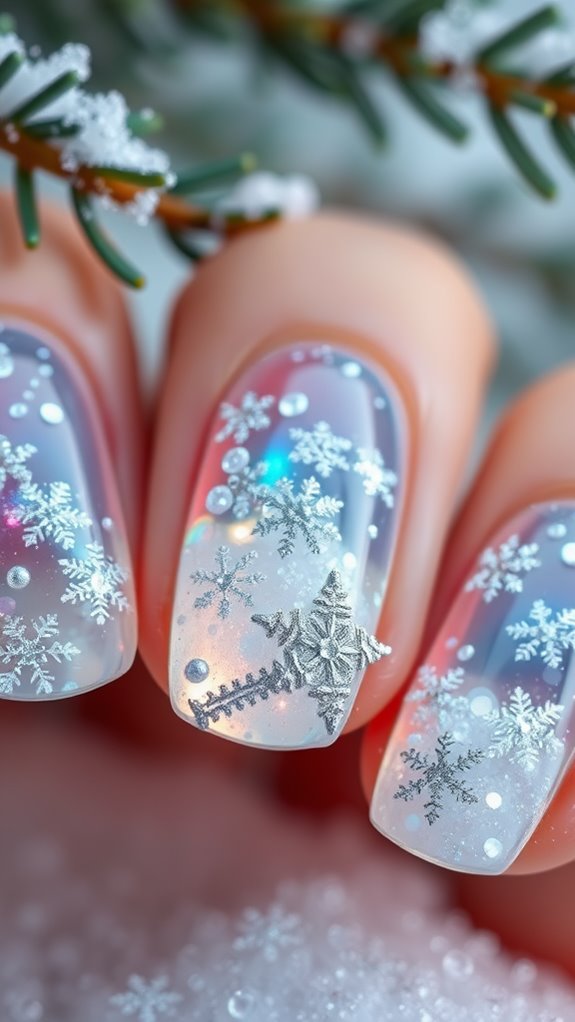
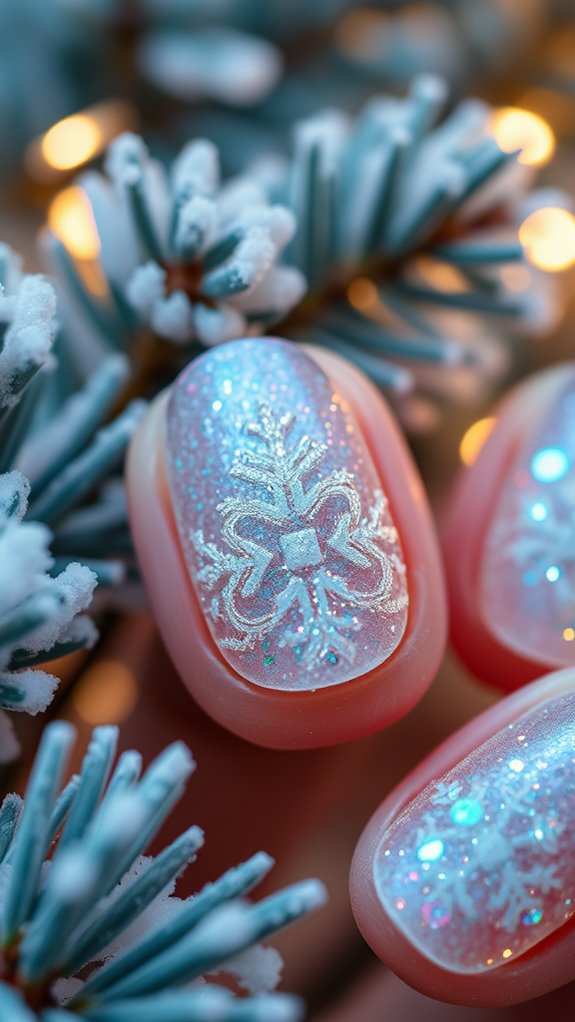
Creative Design Techniques
Winter color palettes can set the stage for stunning nail art, but it’s the creative design techniques that truly make encapsulated nails stand out. You can layer glitter, use fine details like snowflakes, or incorporate tiny charms to elevate your design. Experimenting with different shapes and textures will add depth, ensuring your nails capture the winter spirit in a unique and eye-catching way.
Seasonal Themes and Motifs

Embrace the beauty of seasonal themes and motifs to transform your encapsulated nails into a celebration of nature’s changes. Think snowy landscapes, twinkling lights, and frosted pinecones for winter. You can incorporate elements like delicate snowflakes or deep jewel tones that resonate with the season. Each design tells a story, inviting you to express your creativity while embracing the magic of winter.
Step-by-Step Application Process
Applying encapsulated nails can be a rewarding experience, especially when you follow a clear step-by-step process. Start by prepping your nails—clean and buff them. Next, apply a base coat and cure it under a lamp. Then, place your chosen encapsulated design and seal it with a top coat. Finally, cure again and wipe off any sticky residue for a flawless finish.
Care and Maintenance Tips
To keep your encapsulated nails looking stunning and lasting longer, regular care and maintenance are essential. Moisturize your cuticles daily to prevent dryness, and avoid using your nails as tools. When washing dishes or cleaning, wear gloves to protect them from harsh chemicals. Schedule regular touch-ups every two to three weeks to maintain their appearance and ensure they remain in great condition.